There are many settings that can change the appearance of your web page calendar as well as the program itself. Customize the style of your calendars to match your needs! All of these settings are retained when the program closes so they will be available to you when the program is run again.
Before choosing a setting to change below, click here to learn how to open the Options Window.
The Options Window
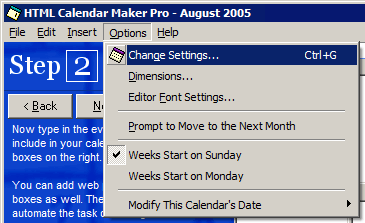
Many settings in this tutorial are modified using the Options window. To open the Options Window, click on the Options menu and then click on Change Settings. See Figure 1, below. This will open the Options window, as seen in Figure 2. It can also be opened from a link in the blue sidebar when you have reached Step 3 of the Creating a Calendar Tutorial.
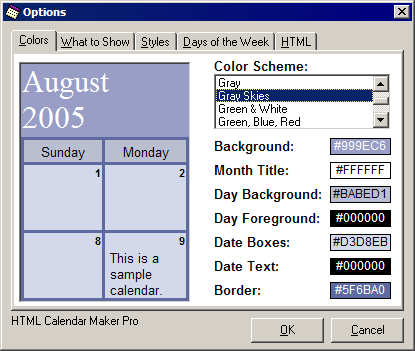
In Figure 2, note the five tabs (“Colors”, “What to Show”, “Styles”, “Days of the Week”, and “HTML”) near the top of the window. Many parts of this tutorial will refer to these tabs.
Clicking “OK” will keep the settings you may have changed in any of the tabbed sections, while “Cancel” will reject all of your changes since the Options Window was last opened.
Changing the Color Scheme
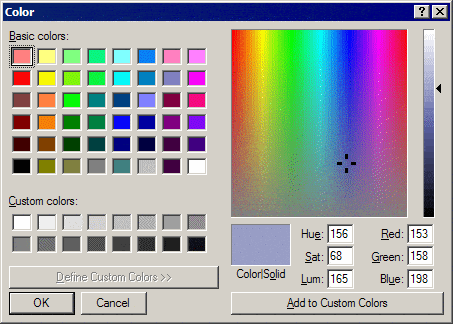
First, open the Options Window. If you are not currently on the first tab, Colors, click on it. You will see a list of your available color schemes, a sample layout of a calendar with the selected color scheme, plus seven boxes displaying the color and its code for HTML (as a hex value) on the right-hand side of this window. See Figure 2, above. To change the colors you can select a different color scheme in the list. If you would like to change the colors yourself, click on one of the seven boxes and you will be allowed to pick a color of your choice, shown in Figure 3. Click OK in the Color Picker once you have selected your color.
If you would like to change any other colors, simply click on the corresponding colored box. Keep in mind that, if you choose colors for your custom scheme, you will lose them if you change to a different scheme. Also note that the word Day refers to the top row of your web page calendar used for the days of the week and the word Date refers to the event boxes. Feel free to experiment! If you would like to purchase additional color schemes, check out the Color Scheme Add-On Packs.
Changing the Visibility and Alignment of Elements
Want to change the title to show only the name of the month and not the year? Want to align the title to the left of the page? Want to hide Saturdays and Sundays when your calendar is displayed as a web page? To modify these options, click on the “What to Show” tab. You will see the following screen.
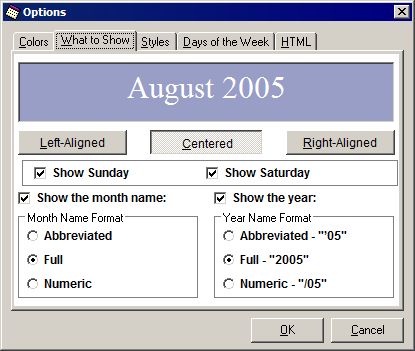
Clicking on the “Left-Aligned”, “Centered”, and “Right-Aligned” buttons will allow you to visualize a change the horizontal position of the title, which appears directly above your web page calendar.
Clicking on either check box, “Show Saturdays” or “Show Sundays”, will prevent you from typing events for either Saturdays and/or Sundays. When your web page calendars are created, these days will not appear on your calendars. This feature is useful, for example, to display events occurring on business days only. To make Saturday or Sunday hidden, make sure its respective check box remains unchecked. To make Saturday or Sunday visible again, make sure that a check appears in the check box for the day you want to see.
If you don’t want to see the name of the month or the year (perhaps you wish to use a graphic you created instead), uncheck the box next to “Show the month name” or “Show the year”, respectively. There are several formats for displaying the month and year, if you wish to display them. Clicking on one of these formats will change the preview in the box above (the box where “August 2005” appears in Figure 4).
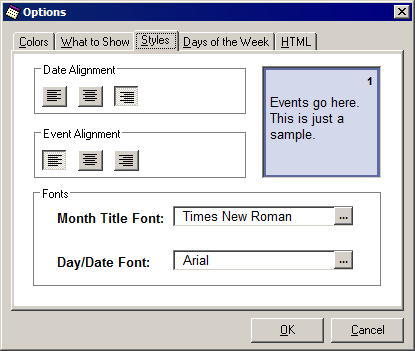
While the previous tab (“What to Show”) allows us to change the alignment of the month title, the next tab, “Styles”, lets us change other alignments. From this tab, you can align the day number to the left, center or right. Clicking on each of the buttons will change the preview to the right. The same holds true for the alignment of events.Return to Top of Page
Changing Fonts on the Web Page
In the Options Window, click on the “Styles” tab, as shown in Figure 5. To change the font of the title that appears above each calendar, click on the ![]() button next to the “Month Title Font” textbox. This opens the Font window where you can change the title to your desired font. The second
button next to the “Month Title Font” textbox. This opens the Font window where you can change the title to your desired font. The second ![]() button allows you to change the font for all of the days of the week and the event boxes- basically any text inside your calendar will be affected by this.
button allows you to change the font for all of the days of the week and the event boxes- basically any text inside your calendar will be affected by this.
Note that, unless the person viewing your web page has the same font installed on their own machine, a default font will be displayed instead. Also note the range of sizes is limited between 8 and 36. This is because the HTML code standard includes seven font sizes; size 1 in HTML is approximately the same as size 8 in Windows and size 7 is roughly size 36. HTML Calendar Maker Pro will automatically round the Windows font size you choose to the appropriate HTML size for you.
Changing the Language and Abbreviations
HTML Calendar Maker Pro was originally released with six languages: English, French, Germain, Italian, Portuguese, and Spanish. Now, it asks for the names of the months and days of the week from your localized version of Windows. This means that, even if you use Windows in a language that HTML Calendar Maker Pro is unfamiliar with, it can still create calendars in your language. Although it has not been tested for every possible language and alphabet, it has been seen to work in several additional languages– including Korean. To access the language settings, which come in abbreviated and non-abbreviated forms, click on the “Days of the Week” tab in the Options Window.
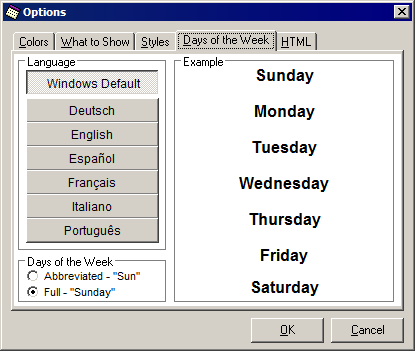
If you wish to use a language listed on one of the buttons to the left, you can click on it and see a translation of the days of the week to the right. Clicking “OK” will effectively change both the days of the week and the name of the month. If you click on the “Windows Default” button, HTML Calendar Maker Pro will ask Windows for the translations in your language, whether or not it is already listed on the left. For additional information on languages, see theUser’s Guide.
To change from full (non-abbreviated) to abbreviated representations of the days, click on one of the options in the botton left-hand corner of the window. The preview will change accordingle. To use abbreviated months, change the “Month Name Format” in the “What to Show” tab, shown in Figure 4.
Changing the Web Page Title and File Name
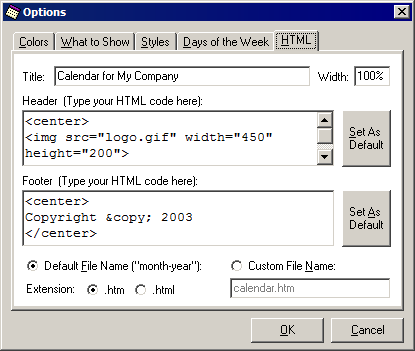
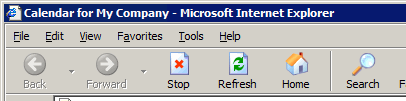
The title of your web page can be easily changed from the Options window under the “HTML” tab. The title appears in the bar at the very top of your web browser (see Figure 8). The title of your web page is saved when you save your events to a file and it becomes the default title for future calendars.
The default file name for saving web page calendars can be changed from the “HTML” tab as well. Although the program will prompt you for the name of your calendar when you save it as a web page, this setting can save you some time if you specify how you want your calendars to be named. By default, your calendar would be saved in the form: August-2005.htm. If your web pages typically end in “.html” instead of “.htm”, then it can be changed here. If you often wish to use your own file name, choose “Custom File Name” and type in the file name of your choice.
Changing the Header and Footer
Although the header and footer require experience with HTML, each can dramatically change the appearance of your calendars. The header code is placed above your calendar while the footer is placed below. To change the header and footer, click on the “HTML” tab in the Options window (see Figure 7). The amount of code you can enter is not limited to the size of the text boxes; scrollbars appear if necessary. Note that, if you are using the unregistered version of the program, you will not be allowed to modify the footer unless you order a registration code.
Although knowledge of HTML code is not necessary to use this program, we highly encourage you to learn the basics. For a list of references for HTML design online and off, check out our HTML Help page.
Changing the Width of the Calendar
The calendars generated by HTML Calendar Maker Pro, by default, take up the entire width of the browser window and will resize accordingly. If you would like to change this default of 100%, simply change the width property in the HTML tab of the Options Window (See Figure 7). You can type in a percentage like 85%, which will stretch the calendar to take up 85 percent of the width of the browser window, no matter how wide the window becomes. An alternative, if you do not want the calendar to dynamically stretch and reduce in size, you can specify the width in pixels. To specify pixels, type in the number but omit the percent sign. For reference, the width of the Options window is 415 pixels.
Changing Fonts Used by the Program
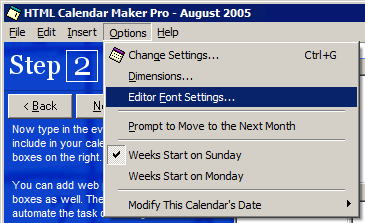
Although most of the settings can be found in the Options window, the setting that changes the fonts for HTML Calendar Maker Pro itself are located in the Options menu under “Editor Font Settings,” shown below. This opens the Editor Font Settings window, as shown in Figure 10.
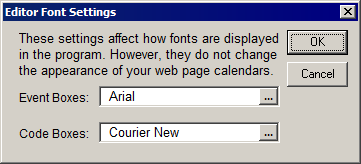
The Editor Font Settings window allows you to change the way text is shown in HTML Calendar Maker Pro. This does not affect your web pages at all. This allows the text used by the program to accomodate the font style, size, and face of your preference. You can change the font for the event boxes (the boxes in the main calendar window where you type all of your events for the month) as well as the code boxes, which are displayed when you are viewing the HTML code generated or changing the header and footer HTML code.Return to Top of Page
Changing Height of the Event Boxes
Another feature of HTML Calendar Maker Pro gives you further control of the calendars your create by changing the height of the event boxes in your web page calendars. To access it, click on the Options menu and choose “Dimensions.” See Figure 11.
This setting is applied on all unused event boxes to specify the minimum height for each row. This means, for every blank day, you can specify how many empty lines are inserted. Therefore, if you want your calendars to be very tall, set the number of lines to the maximum of ten. If you don’t want any lines inserted, choose zero. Note that, if you have an entire week with events listed for every day, the web browser will modify the height of the row to match only the space required to display your events. If you have at least one day without any events, however, the height of that row will be set by the number of lines you choose. The default is 4 lines.

Changing the Starting Day of the Week
The default starting day of the week for HTML Calendar Maker Pro is Sunday but users may choose to start the week on a Monday instead. To change this, the most convenient method is through the Options menu. After clicking on the Options menu, you will see two submenus: one for Sunday and one for Monday. You can switch between the two by simply clicking on the menu representing the day on which you want the week to start. The layout of the calendar will change accordingly and this change will also be reflected in your web page calendar.
Click here for more documentation